The data collected at the beamline first needs to be exported to the Globus cloud platform before transferring it to the local computer. This involves connecting remotely to the computer (if you are not on-site) and loggin into the PyAcq software to retrieve your data. The instructions can be found in the file here: BioXAS Imaging Beamline Data Export Guide.pdf
Log out of your PyAcq session once the data export has been initiated. The export process will continue running in the background.
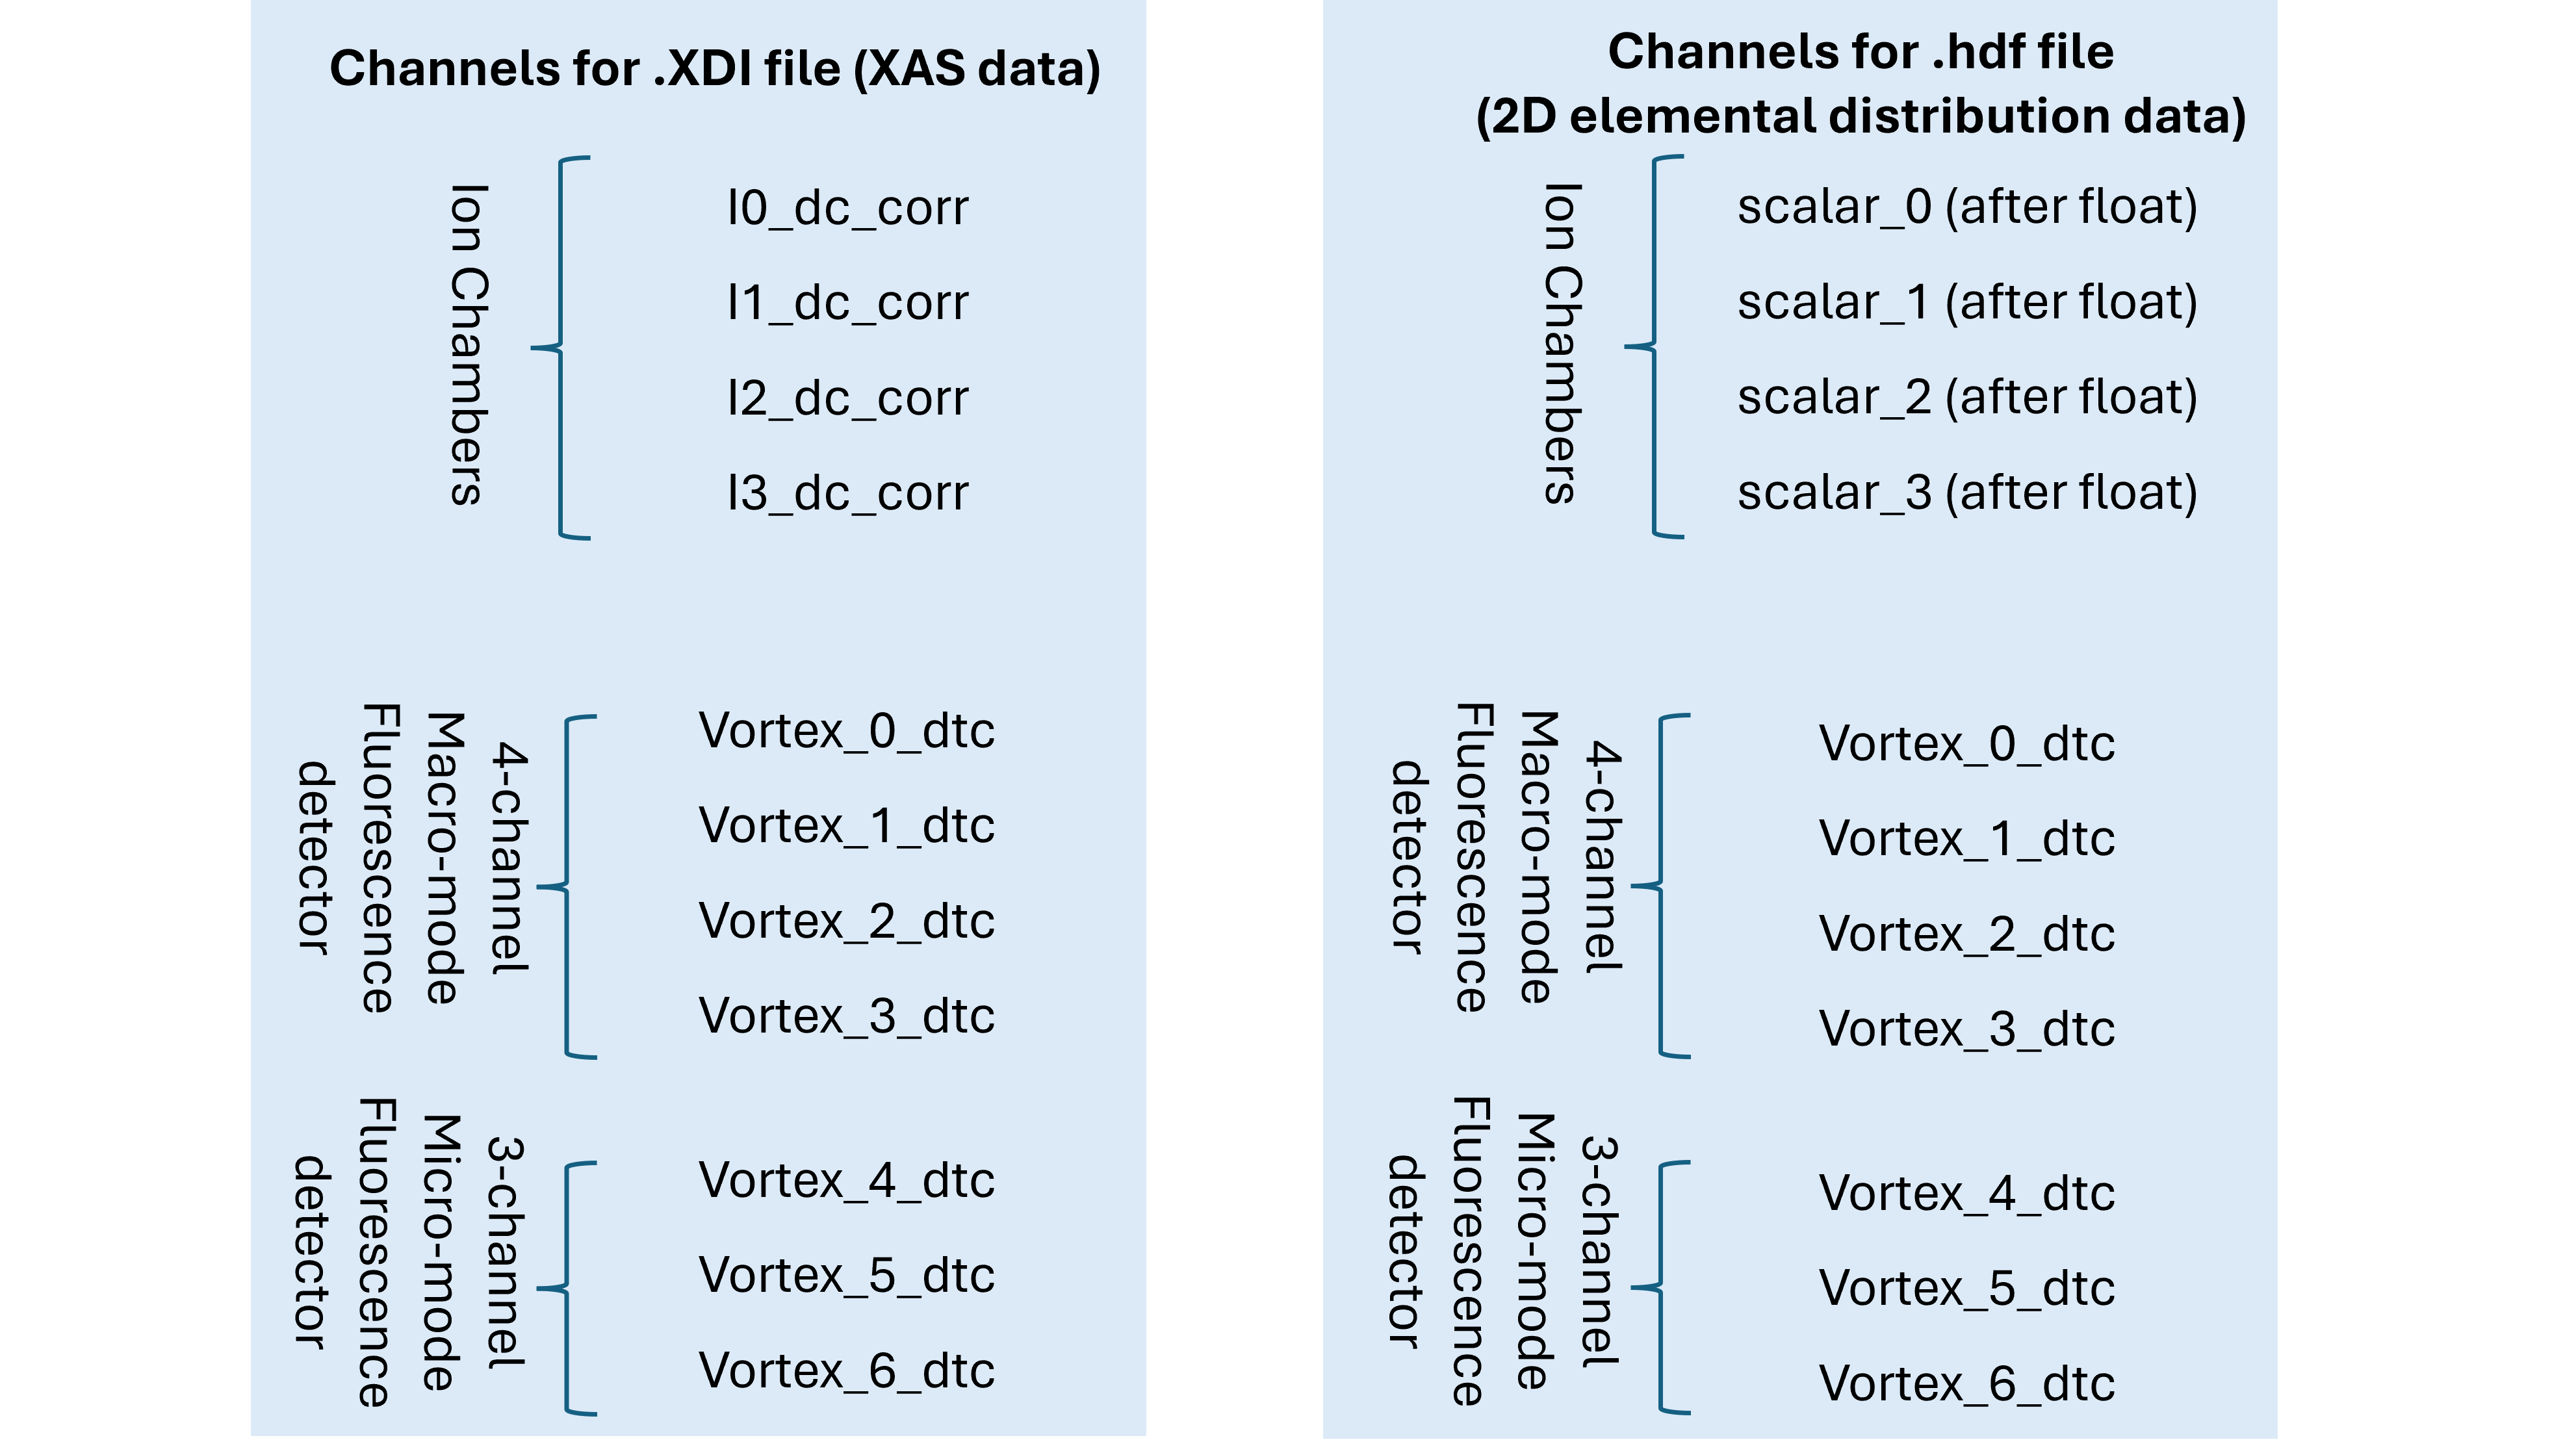
The exported data contains multiple channels corresponding to different detectors. The data from all the channels shall be exported. Refer to the setup schematic to identify the detector positions and select the appropriate data channels for your analysis in Athena, Larch, PyMCA or any other software of your choice.
The exported data is then accessible on Globus platform and is attached to your Canadian Light Source account and projects. To retrieve the data, please follow this step-by-step guide.
Acess CLS Data on Globus
Globus delivers advanced file transfer and sharing capabilities to researchers no matter where their data live. Globus Connect Server makes it easy to add your lab cluster, campus research computing system, or other multiuser HPC facility to the Globus ecosystem. The CLS provides a Globus Connect Server endpoint that connects to our beamline data share, allowing users associated with scientific proposals access to their data.
Step-by-Step Guide
Log in
-
Access Globus.
-
Select the Canadian Light Source as your institution. Click Continue. You will receive the familiar CLS sign-in page.

-
Enter your CLS username and password. Your first log-in will register you with Globus’ systems, which is important if other users want to share with you.
-
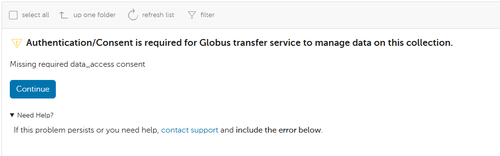
Authentication/Consent authorization may be required upon the first login. Click Continue to proceed.
File Manager | CLS Beamline Data
-
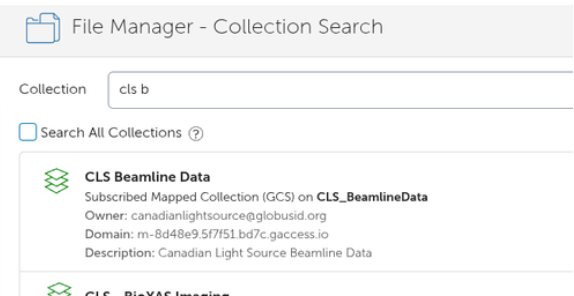
Go to the File Manager view and select "SEARCH"
-
Search for the "CLS Beamline Data" Collection - this is our CLS endpoint on Globus
Path to Project Data
-
The CLS Beamline Data Collection will open with your CLS username as the Path and display any project folders you are involved in.
-
You will see the project you are interested in transfering data from.
Set-up Personal Endpoint
-
In order to transfer the data to your personal computer, institution workstation or computing system you must first setup a personal endpoint. Your institution/you may already have this configured. If not:
-
Navigate to Globus Connect Personal
-
Install the Globus Connect Personal for your operating system
-
Launch Globus Connect Personal and 'Log In' to authenticate with Globus and begin the Collection Setup process.
-
Enter Collection Details for your Personal Setup and 'Save'
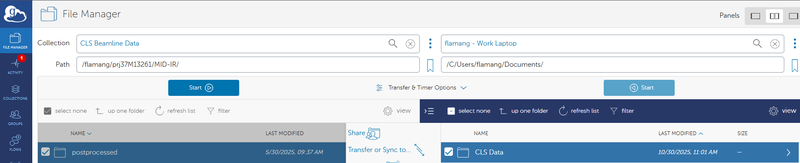
Transfer Data from CLS to Your Endpoint
-
Select the files you wish to transfer to your computer
An important note: Once you are on Globus, for a project number such as prj123456, and a username user_abc, please download files from the following directories:
-
2D scan data:
/user_abc/prj123456/BIOXAS_IMAGING/export/hdf5/ -
XAS data:
/user_abc/prj123456/BIOXAS_IMAGING/export/xdi/
(Note: the "e" in export is lowercase.)
-
Select the desired destination
-
Click Start on CLS Beamline Data side.
-
The two-pane view works well for this.
Software and data analyses
PyAcq software
-
Multi-threaded, Python-based data acquisition software with stand-alone GUI and Scanner, each can run independently.
-
Supports the following acquisition modes: one or two-positioner scan, fly scan imaging for macro-mode, step as well as fly scan imaging for micro-/nano-mode, with scaler signals and Xspress3-Vortex data.
PyAcq powerful features
-
Dynamic ROIs view during data acquisition without delaying data update on the display.
-
Ability to view full MCA spectra from a single point or a defined region during data acquisition.
Data analyses
-
Imaging data exported in HDF5 format compatible with PyMca data analysis software.
We recommend using PyMCA version 5.9.1. Newer versions may display errors when importing our HDF5 files. The recommended version can be downloaded here:
PyMca software
-
The procedure on how to use the PyMca software for the BioXAS data analyses is shared with our users upon request.
Larch software
Detailed training videos on how to utilize the Larch software can be found here. These videos present visualization and analysis of X-ray Absorption Spectra (XAS, XANES, and EXAFS) with the Larch XAS Viewer application.